Configure Google Domain and Subdomain for your Heroku Applications
Software Engineer that works mainly with Go and Python. Loves music and beer.
I found myself very confortable working with Heroku, so I decided to use it as my main platform to deploy my applications. That, along with my Google domain, was a great combo to get my website up and running in no time, or so I thought.
It wasn't too long before I realized it was not going to be that easy to achieve. Probably because I was not very familiar with websites and domain configurations, or with Heroku, or it was just not that simple, or maybe all of the above. I found a vast chunk of information related to Google domain configurations and Heroku app configurations, but a very few that talked about both together.
After a few hours and several tries, I managed to get it working (very easily) and so I decided to create a short guide on how to achieve this for anyone who may find it useful.
This might seem obvious, but I don't want to take for granted the things that need to exist for this to work:
Prerequisites
A Google Domain. You can get it here if you don't already own one
A Heroku application. One with a paid dyno would be recomended to save you the provisioning and management of SSL certificates process
Add domain to Heroku
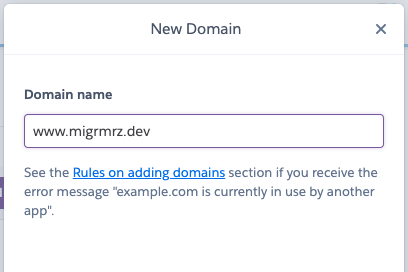
We need to let Heroku now that we would like to work with our own domain instead of the one that is provisioned. Go to you application, click on Settings and scroll down to the Domains section to click on Add domain and add your own main domain:
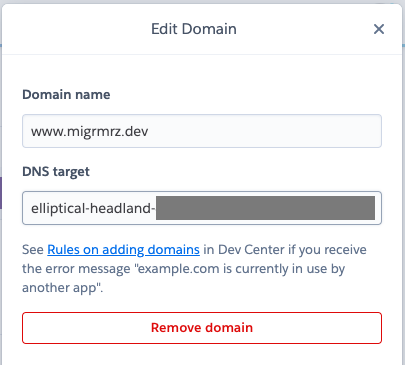
This will add the record and create a new DNS Target. Copy this and save it because we will use it next.
Google Domain configuration
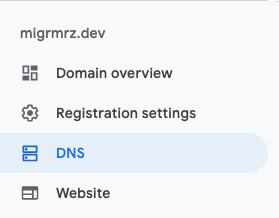
Now we need to open Google domains and click on DNS under our domain.
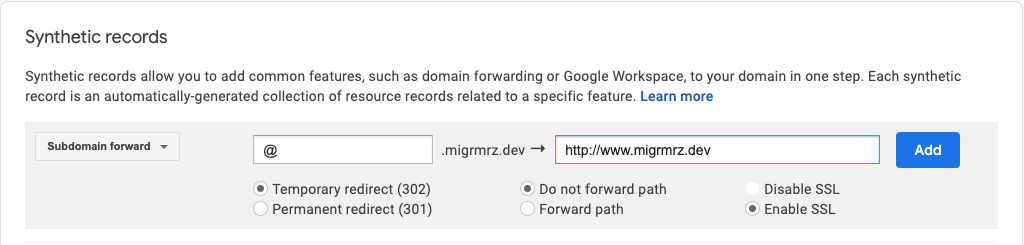
Scroll down to the Synthetic Records section and fill the following information for a Subdomain forward record: "@" for the Subdomain field, the full url of your main domain for Destination URL, in my case it was "http://www.migrmrz.dev", and check Temporary redirect (302), Forward path and Enable SSL.
It will appear below like this once you add it.

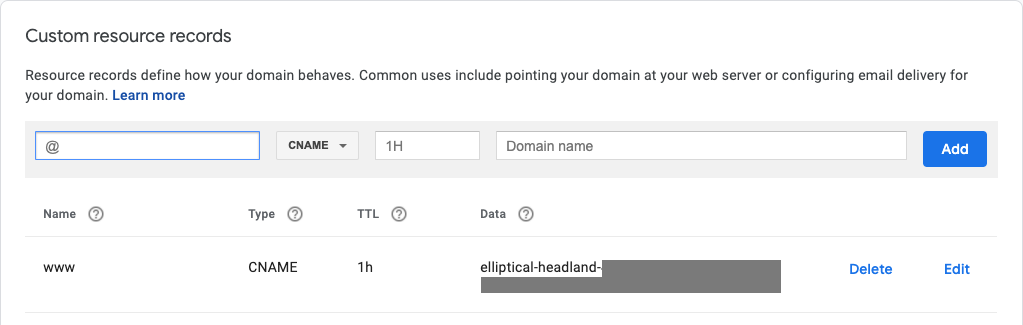
Now go down to Custom resource records and fill the following: "www" for the "@" field, choose "CNAME" for Type and for Domain name, paste the DNS Target that you copied from Heroku on the previous section.

You will then have the record below.
That's all you need, really. You might need to wait a little bit before the changes take effect but after that you will be ready to go.
Google Subdomain configuration
In case you want to create an app and deploy it on a subdomain from the same domain, you can configure it on Google for it to work along with Heroku. The only thing to need to do is repeat the steps on the Add domain to Heroku section with your new subdomain. I'm working on an app that I want it to be deployed on a subdomain called "lastify.migrmrz.dev" so that's what I added.

Again, copy your DNS Target and go back to Google Domains under Synthetic Records to add your new subdomain. This time the name of the subdomain will go in the "@" field.
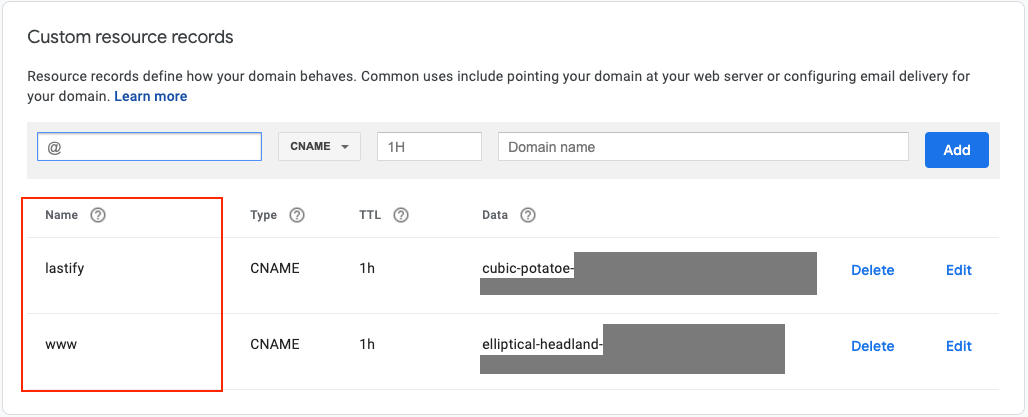
And that's all there is to it. You can do that for as many subdomains as you would like to configure on your website.